Archive

Tag Archives: meatless monday

making tacos tortillas lentils

Photo: Lionel Gustave @lionel_gustave

I know what you’re thinking: Two ingredients? Where’s the rest of the taco?

So, I’ll be upfront in addressing that this is about making the vegetarian taco “meat” But to set up the rest of the taco bar, add as many or as few of these things as you’d like:

    • Shredded lettuce
    • Diced tomatoes
    • Diced onions
    • Shredded cheese (or crumbled cotija cheese… or both)
    • Salsa
    • Taco sauce
    • Sour cream
    • Guacamole
        + tortillas!

Hard, soft, folded, flat, bring them on!

Ok, now that’s out of the way, let’s make this as simple as possible:

What You Need:
2 cups cooked lentils (cook according to the package)
1 packet taco seasoning

What You Do:
Cook the lentils
Add the seasonings
Assemble the tacos

That’s it! And before you ask, “What the heck did I just read,” let me explain. When I started cooking for myself, I literally needed directions for everything, including little things like, “lentils can be combined with pre-bought spice packets.” For some reason with cooking, it’s really easy to complicate things.

For example, could you go out and buy each type of spice in those packets, measure out the exact amount in each, and use that? Sure. But why? One tiny packet should make you roughly 2 cups of cooked lentils. That’s a lot of taco filling!

And if you’re a person who was like me and made cooking a very precise, semi-stressful event: it’s ok. This is just cooking, not baking.

wink michael scott gif

Messiness: I gotta be honest, taco bars can get pretty messy, so use some cheats. Get pre-shredded lettuce and canned diced tomatoes. It’s a taco, you can only go so wrong with the ingredients.

Budget: I found all of these items at my local 99 Cent store, so you can make roughly 20 tacos (give or take 5) for around $10. That’s about $0.50 a taco. Cheaper than the truck, right?

Simplicity: This is kinda the whole point of the recipe: keep it simple. Growing up, our mom fried all of our taco shells and it felt like the fanciest, most labor-intensive thing, and it can be that way. But there are ways to make everything taste just as good while cutting a few corners.

Delicious Scale: If you give taco meat a 10/10, then look forward to more of the same. Lentils have a similar texture to ground beef and they absorb flavor well, too.
This post isn’t so much about a recipie as it is about a cooking tip I realized this past week.

Did you know you can stuff peppers with premade contents???

I know, this sounds super remedial, but if you’re like me, then sometimes you get into this mental rut where cooking is an all or nothing affair. But that’s not always true!

Case in point is the stuffed red pepper I made this weekend (not the pepper pictured above — shoutout Wikimedia commons, because I’m still garbage at food pics). It had brown rice, lentils, garbanzo beans, peas, edamames, carrots, and other chopped goodness in there. Sounds like a lot of work, right? Making the rice and lentils, and chopping the carrots. WRONG!

I cheated, used the contents from one of those instant steamer bags, and voila!

Seriously, that’s it. I cut the top off the pepper, emptied it, sprinkled some cheese in the bottom, added the frozen contents from the bag, stuffed some more cheese in the top, and baked it (375 degrees for 30ish min).

See? How easy is that?

Then I put the rest of the bag’s contents in a pan, steamed it with a little water, and dinner was done.

It may seem like such a straighforward tip. But for me, it was a revelation.

If you have any tips like this, I’d love to know!

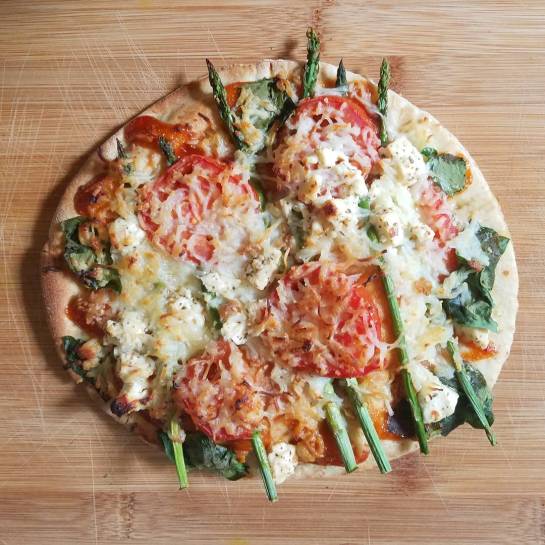
asparagus pita pizza

I’d have to say that pita pizzas are a big staple in my diet when I’m trying to lose weight. They’re simple, satisfying, portion controlled, and can be as healthy as you want to make them… and as fancy too.

But what happens when you’re out of pizza or spaghetti sauce?!

That happened to me recently, and I had to get creative. I’m in a pretty big sriracha phase, so I thought, why not try and find a way to make that work? It was pretty perfect. With that said, if you’re not a spicy fan, you can easily make this pizza with spaghetti sauce too (just swap the sauce of your choice when you read about the oil and sriracha).

What You Need:

  • Sriracha
  • Olive oil
  • 1 pita
  • Asparagus (try to pick some on the smaller side so they don’t take as long to cook)
  • Tomatoes (sliced)
  • Spinach
  • Shredded/grated mozzarella cheese
  • Feta (optional)

What You Do:

  1. Cover the pita in a thin layer of oil.
  2. Spread as much sriracha on your pita as you can handle (I like to make fun designs because I’m a basically an adult who refuses to grow up)
  3. Layer spinach leaves on the sauce
  4. Cut the asparagus to that it’s the size of the pita, then arrange as you like with the tomatoes
  5. Sprinkle a layer of cheese over your pita (the more the better imo, but you can use as much as you want)
  6. Bake for 10-15 minutes at 350 degrees either on the rack itself or on a baking sheet

Enjoy!

Messiness — not messy at all… unless you get into a food fight halfway through in which case all bets are off.

Budget — Depending on what’s in season, you can make this all for under $8 I found all of the ingredients at my local 99 Cent store, which puts each pizza at about $1-2/each.

Simplicity — It’s pretty darn simple. A bit more work than putting a premade mini pizza in the oven, but much fresher and healthier.

Delicious Scale — Frankly, I was shocked how much I liked sriracha in place of regular sauce. Together, these flavors reminded me of the Yardhouse’s thai chicken pizza… minus the pizza.

Now that I don’t have a job that begins at 6am, I’m trying to adopt a lifestyle that lets me get my important things done in the morning, and then I can relax at night. For me, this typically means working out, writing for 30 minutes in the morning, and squeezing in 10 minutes of yoga meditation. What’s weird though, is that since I’m trying to achieve so much in a matter of hours, I find myself shortchanging my breakfast.

I’ll grab a drive-thru Starbucks spinach feta wrap, or heat up some oatmeal at work, but truth be told, I’m usually starving by then.

So, I needed an easy solution to having a healthy breakfast without it cutting into my new routine.

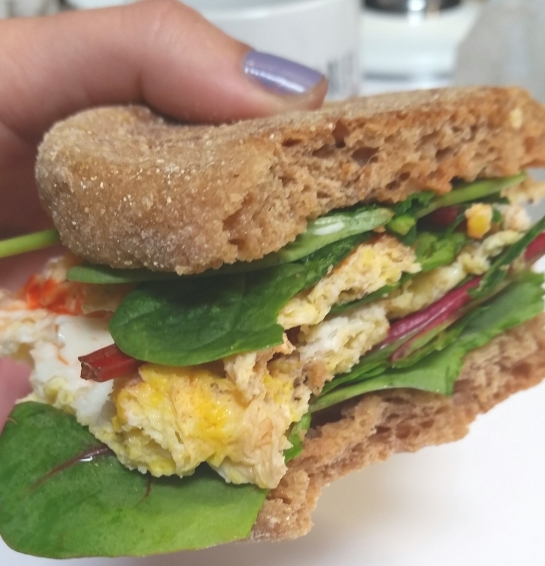
My answer was simple. Scramble eggs + toppings in a coffee mug, microwave it for 1-2 minutes, which is as long as I like my English muffins to toast. 2 minutes and 30 seconds later, you’ve assembled a scrambled egg sandwich. Healthy, portable, and the cleanup is just your coffee mug.

breakfast sandwich

Here’s how to do it:

What You Need:

1-2 eggs (I do 1 egg 1 and 1 egg white)

Cheese

Tomatoes (chopped)

Spinach

Salt, pepper, etc. (whatever seasonings you like in your scrambled eggs)

1 English muffin (or bagel)


What You Do:

Crack the eggs into the mug and mix scramble with a fork

Add in the toppings and seasonings; mix together

Microwave for 1 minute; if it doesn’t look cooked, continue cooking for 30 seconds at a time (after you do this twice, you’ll get a sense of how long it will take)

Toast your English muffin/bagel

When the eggs and muffin are done, assemble into a sandwich


TIP: Wrap it in foil to keep it warm and portable if you’re on your way out the door


Messiness:

Not messy at all, especially since it’s all contained in the mug.

Budget:

Really cheap. It’s the same cost as scrambled eggs, or anything else you’d eat for breakfast. And over the course of a week, it’s cheaper than grabbing a fast food breakfast sandwich.

Simplicity:

It’s as hard as making mac’n’cheese in the microwave. If you’ve done that, you can easily make this. You can also play with your toppings. Add an avocado when you put the sandwich together, change up the cheese you use, add chunks of ham. There are lots of options for you.

Deliciousness:

I happen to LOVE scrambled eggs and breakfast sandwiches in general, so for me, this is about as good as it gets.
And, if you want to make it low-carb, just don’t use the bread, and eat your eggs right out of the mug. It’s completely self contained.

A couple of posts ago, I revealed one of my worst habits to you: buying produce and not using it all. Every single week, without fail it happens; I start out with the best intentions to eat well and not be lazy, but it just goes awry.

This week, add to that the fact that the basil I’ve been growing was going through the STRUGGLE! So, I quickly plucked some of the not-too-floppy leaves and decided to get less lazy and more creative.

I’ll give you the step-by-step instructions, since I know that can be helpful, but I’ll add some notes throughout in case your veggies on-hand were a bit different than mine. Can’t wait to hear how yours comes out!

‘BEFORE IT GOES BAD’ PASTA

What You Need (aka What I Had On-Hand)

2 cups yellow cherry tomatoes (or 1 container from the store)

2 red peppers (chopped)

2 garlic cloves (minced)

1/3 bag of angel hair pasta

handful of fresh basil

2 TBSP olive oil (maybe more)

lots of fresh Parmesan cheese

1 TBSP Balsamic vinegar (optional)

Salt, black pepper, crushed red peppers (all optional and according to your taste preferences)


What You Do:

Start cooking the pasta in a pot (NOTE: I used angel hair pasta because it’s what I had. You can use anything)

While it’s cooking, in a small skillet, warm up the olive oil on medium-low flame and add garlic

Add chopped peppers after about 2 minutes, making sure the garlic doesn’t get too brown. The goal here is to flavor the oil, which will be your sauce. If the veggies soak up too much of the oil, definitely add more! (NOTE: I didn’t have any onions or shallots, but those would also be great to add at this stage if you have some). Stir occasionally, and let cook for about as long as the pasta takes, unless the garlic begins to get really brown, then you’re done.

While all of this is cooking, halve the tomatoes, wash and julienne the basil so it’s ready to go. (NOTE: use fresh Parmesan cheese so it melts thanks to the hot pasta and sauce)

Once the cooking is done, combine everything and enjoy!


Messiness – The cutting board, one pot and one small skillet are the only equipment needed, though that is more than just one bowl, so I’m not sure if I’d say this isn’t messy, but it’s certainly not something that will destroy your kitchen.

Simplicity – Super simple! All of the prep is done in stages while other things are cooking. It may seem a little involved, but you’re done within 30 minutes, and I had enough to take to work for three days worth of lunches. Also, nothing is terribly difficult to where you need to pay lots of attention to it.

Budget – It’s as expensive as the ingredients you already bought, or want to buy. As with most of my recipes, olive oil is the most expensive part, but even with how much I use it, one bottle usually lasts me for months.

Delicousness – Pasta, cheese, veggies, and a garlicky sauce… I’m not sure what else I could want out of a fresh lunch!

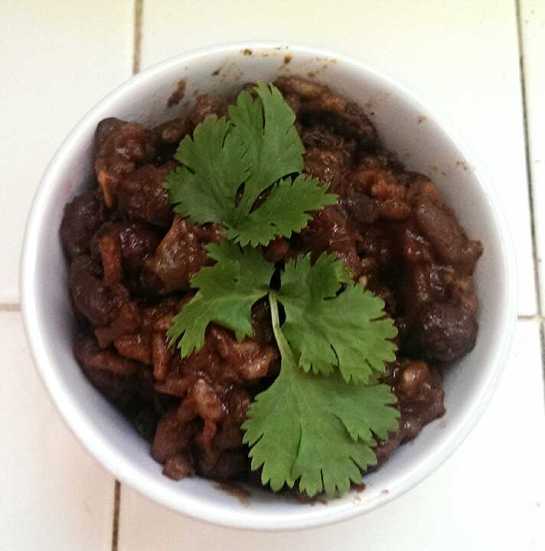
black beans spanish brown rice

Whenever I’m trying to eat healthy, I have a few staples that help me stay on track. Eggs and apples are obvious ones, but I recently came up with this recipe for black beans and Spanish brown rice.

Now, if you’re looking for the most authentic tasting Spanish rice, this isn’t it. But, I can say that everyone who has tried it has loved it! It can also be a versatile base for other vegetarian things like tacos and burgers (see the Simplicity section below).

Also, I used dried black beans for my recipe, but you can just as easily use a can of black beans, and since that’s what most people use, I’ll write the recipe using a can.

That said, I’m a big fan of buying bags of dried beans and legumes, soaking them while I’m at work, then cooking them when I get home. Also, it’s extremely cost effective since a bag of black beans is about $1 and will make 3-4 cans worth. Also, then I just always have food on-hand since I try not to stock my cupboard too much ahead of time.


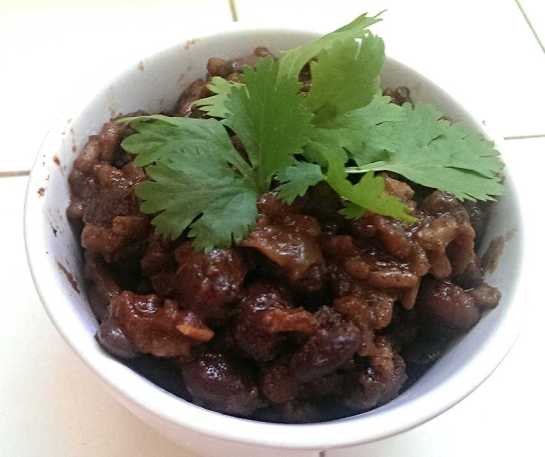
black beans spanish brown rice 2

What You Need:

One can black beans

3 roma tomatoes (chopped)/can of diced tomatoes

Small handful copped cilantro (optional)

1 can tomato sauce (not paste, not pasta sauce, just tomato sauce)

1/2 diced yellow onion (optional)

1/2 cup brown rice

1/2 TBSP chili powder

1 TBSP garlic salt (or 1/2 salt and 1/2 garlic powder)

1/2 TBSP oregano

1 tsp black pepper

1 cup vegetable broth (optional – I didn’t use it in the photo above, and it still tasted fine)


What You Do:

Cook your brown rice according to the instructions (I just cooked my beans for 2 hours, then when they were near tender, I added the brown rice and cooked for another 30 minutes, which is why mine have a darker color than usual)

While it’s cooking (before the rice is done), add the tomatoes, onions, tomato paste, chili powder, garlic salt, oregano, black pepper, and vegetable broth. Continue cooking until the rice is tender

Add the beans and cilantro and cook together for a few minutes, until the beans are warm (If you used dried beans, then just add cilantro and serve!)


Messiness – This is not messy at all! The measurements don’t need to be exact, so feel free to measure them over the pot to cut down on even more mess.

Simplicity – What isn’t there to love about a recipe that you can leave on the stove while you do something else and it takes care of itself? That’s exactly how easy this is. And it’s easy to make other things with it. For example, use this as the base for some veggie tacos, or shape the mixture, roll it in bread crumbs, and quickly bake for super easy veggie burger patties.

Budget – This is my favorite part of this recipe! Like I mentioned, I use a bag of dried beans, and have a bag of brown rice, so the only things I needed to buy were tomato paste and tomatoes, both of which totaled under $2 (I found 6 fresh roma tomatoes for $1 at Fresh and Easy). Not only is it cheap to make, but it makes a lot! This recipe is enough to feed 2-4 people, or to have that many premade meals for your week.

Delicious Factor – It’s great! Of course, true Spanish rice is made with white rice, so this definitely tastes healthier, but it doesn’t take away from the final product at all.